Anamorphix is a lightweight tool for photographers using anamorphic lenses. Automatically detect and batch desqueeze DNG images based on embedded metadata or manual input.
How Anamorphix Works
Anamorphix is designed to make desqueezing your anamorphic stills as painless and predictable as possible. Built with photographers in mind, it walks you through the process step-by-step.
Here’s how it works:
Folder Selection:
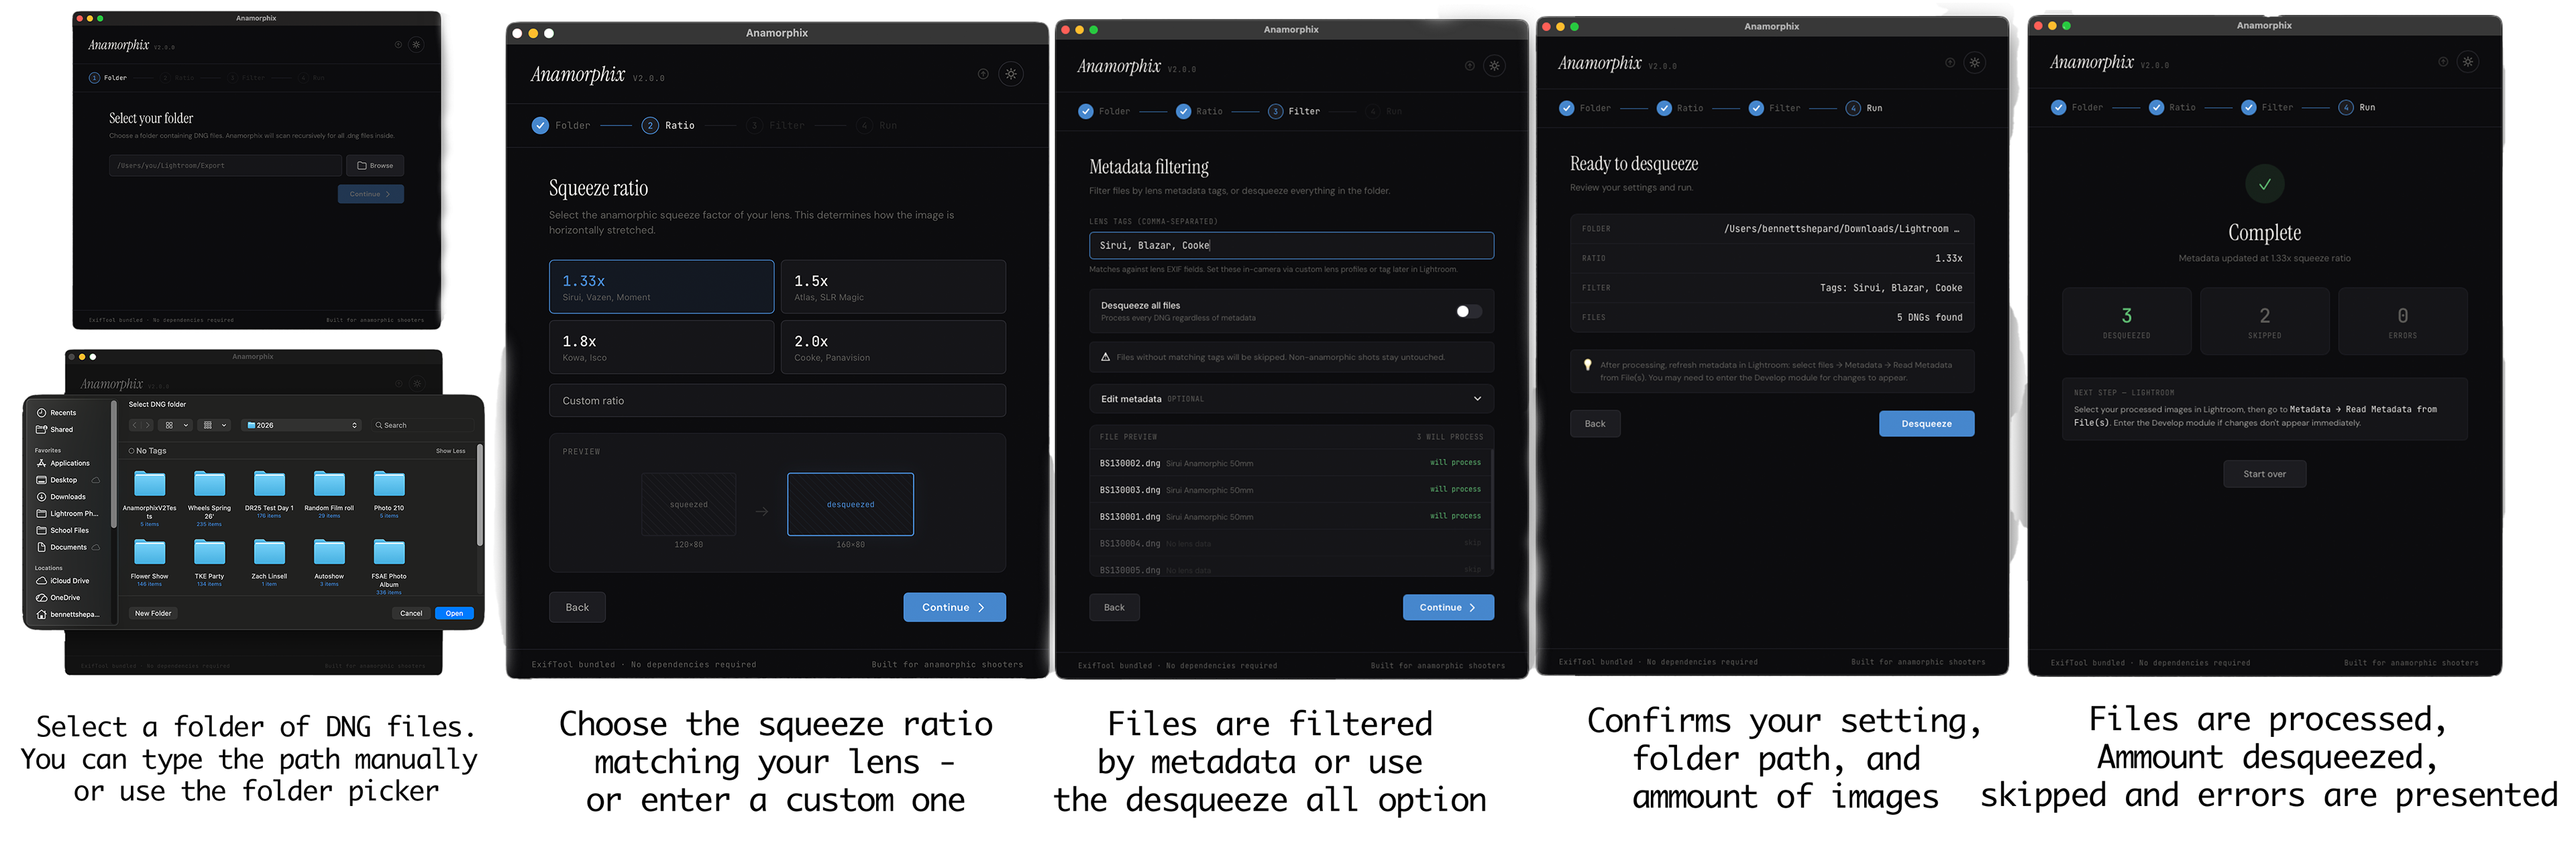
Start by selecting a folder that contains your DNG files, I usually do this after importing and converting to DNG in lightroom, You can either paste the full path manually or use the visual folder picker for a smoother experience.
Squeeze Ratio Detection:
Choose from common anamorphic ratios — 1.33x, 1.5x, 1.8x, 2.0x — or enter a custom value. A live preview shows the before and after aspect ratio so you can confirm before processing.
Optional Metadata Filtering:
Most anamorphic lenses lack electronic contacts, but modern mirrorless cameras like the OM-1, Sony Alpha, and Fuji X series let you assign lens info via custom profiles or EXIF fields. Tag your shots with a lens name like "Sirui" or "Cooke" in-camera or in Lightroom, and Anamorphix will only desqueeze files that match.
Don't need filtering? Toggle Desqueeze All to process every DNG in the folder.
Don't need filtering? Toggle Desqueeze All to process every DNG in the folder.
4. Edit Metadata (optional):
For lenses without digital contacts, Anamorphix can write additional EXIF data alongside the desqueeze — focal length, lens/adapter name, and taking lens notes. Most users skip this, but it's there for those who want cleaner metadata.
For lenses without digital contacts, Anamorphix can write additional EXIF data alongside the desqueeze — focal length, lens/adapter name, and taking lens notes. Most users skip this, but it's there for those who want cleaner metadata.
Built-in Safeguards:
If anything’s missing — like a folder path or lens tag — Anamorphix alerts you with a clean dialog. It will also read the file and prevent double de-squeezing of images, so its safe to run again and again.
One-Click Results:
Once you’re ready, the process runs automatically and gives you a completion report: how many files were desqueezed, skipped, or errored.
Lightroom Metadata Refresh:
After running Anamorphix, Lightroom may not immediately reflect the updated aspect ratio.
Here’s how to fix it:
Select the affected image(s) in Lightroom
In the top bar, find "Metadata" and choose “Read Metadata from File(s)”
If it still doesn’t update, try restarting Lightroom
Most often, the correct desqueeze appears once you enter the Develop module.
Download and Technical Info
Version: Anamorphix V2.0
macOS & Windows
Github Releases: https://github.com/Bennalex05/Anamorphix/releases/tag/v2.0.0
3. Download Anamorphix
Click the Icon to the right to be taken to the releases page
Download the file for your operating system
Follow the steps explain earlier in this page!
